Create a new file from DXF file
Icon |
Menu bar |
Keyboard shortcut |
|---|---|---|

|
File > Import |
Ctrl + I |
The DXF import function allows you to transfer an entire front panel from a DXF file to an FPD file. You can also use the DXF import to import just the outer contour or just the inner counters (drill holes and cut-outs) of a front panel.
DXF file requirements
It must be a 2D file.
Since the largest closed contour of the DXF file is the one generally identified as the outer contour, the drawing must not include any drawing frames or similar. It is also not possible to select the desired front panel from several front panels in a DXF file during import.
Normally, the DXF file should contain the entire front panel. In addition, it should not contain any other objects
If the file contains labels that should be imported, the text must be formatted as paths.
Calling the function
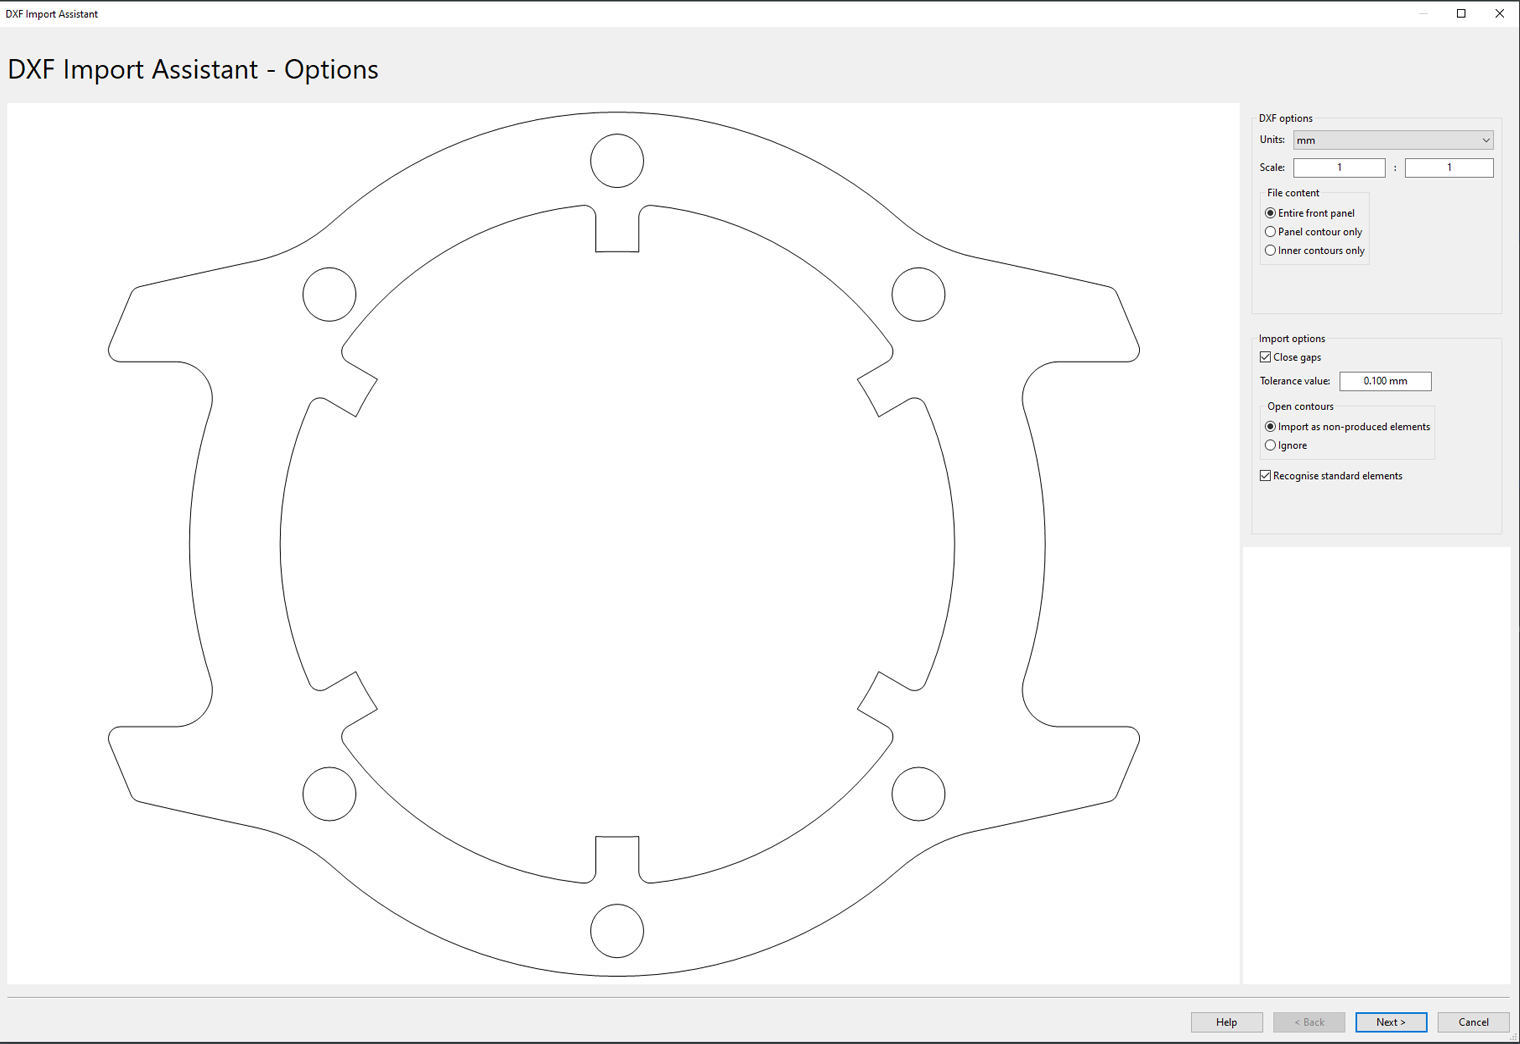
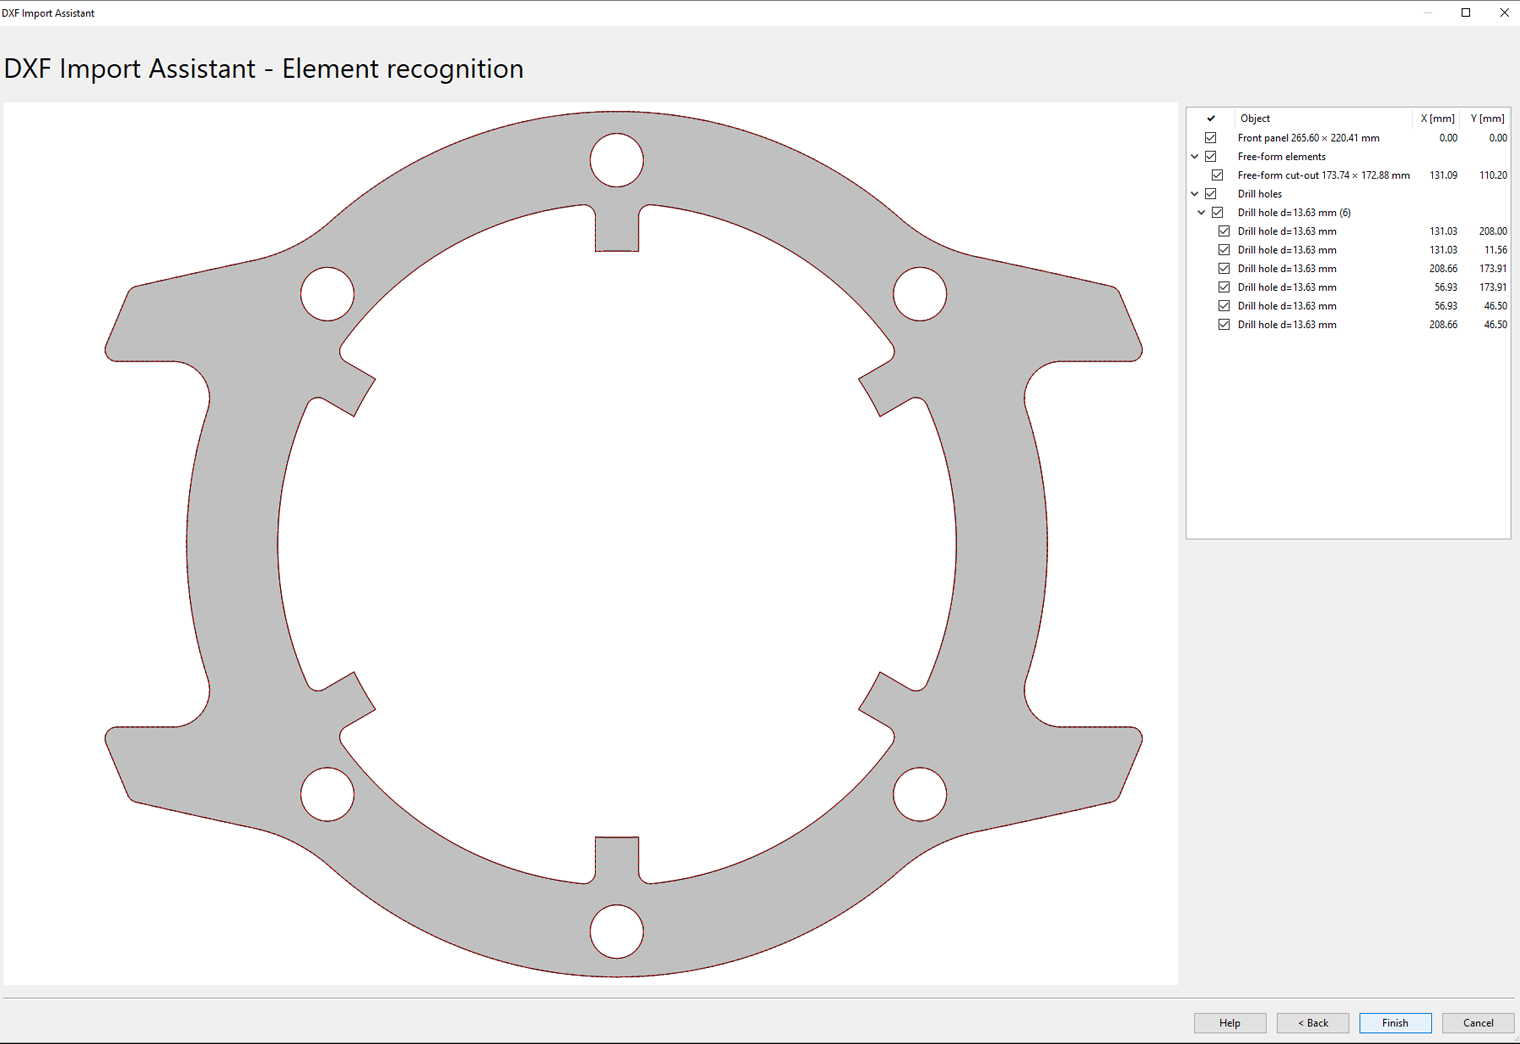
Select File > Import from the menu bar and load the desired DXF file from your directory. The DXF import wizard opens. From here, it takes two steps to get to the front panel: In the first dialog, you specify how to interpret the DXF file’s contents and set some other options. In the second dialog you can select which of the identified elements are to be transferred to the FPD file.
DXF import wizard – options

Option |
Description |
|||||||||||||||
|---|---|---|---|---|---|---|---|---|---|---|---|---|---|---|---|---|
Units |
In most cases, the DXF import wizard recognizes units of measurement in the DXF file (mm or inches) and imports them. If the units cannot be recognized, you will be prompted to enter them in manually. |
|||||||||||||||
Scale |
Enter the scale found in the drawing in the DXF file here. The front panel is scaled accordingly so that it is produced in the correct size. |
|||||||||||||||
File content |
Note: You do not use the option you selected here to decide which parts of the DXF file you ultimately want to import, but rather you give the import wizard a note about what is contained in the DXF file at hand. This has an influence on the milling elements recognized in the next step. Entire front panel
Panel contour only
Inner contours only
|
|||||||||||||||
Import options |
Close gaps
|
|||||||||||||||
Open contours |
Import as non-produced element
Ignore
|
|||||||||||||||
Recognize standard elements |
Activating this option will cause contours that match standard elements in Front Panel Designer to be recognized. These standard elements are created during import. This has the advantage that you can continue to edit these elements in the corresponding property dialogs in Front Panel Designer.
|
DXF import wizard – element recognition

At this stage, you will be shown a preview as well as the results of the defined properties. You can select which elements should be imported into the FPD file.
Area |
Description |
|---|---|
Preview |
The recognized elements are displayed together with the original contours from the DXF file (red dashed line), so that you can detect any deviations. |
Element tree |
The elements in the element tree are sorted by category. Elements of similar type and size are grouped together. You can highlight an element in the preview display with a color by clicking the corresponding row. To exclude an element from the import, click the checkbox next to the respective element. Note: You can also deselect the front panel itself in the element tree (with either the Entire front panel or Only outer contour options). In this case, a new file is only generated if no front panel file is open. If a front panel file is open, the selected elements will be imported into this front panel as inner contours. |
Further editing following import
- Import of a complete front panel:
After you have completed the import by clicking Finish, the front panel’s properties dialog opens. All further changes to the front panel’s settings – in particular, material thickness – are made here (see Basic shape, Dimensions, etc.). You can continue to edit the imported elements after the FPD file has been created.
- Import of inner contours into an existing FPD file:
The imported elements can be processed immediately following the import.
You can continue to edit the recognized elements from the DXF import assistant by opening the properties dialog (double-click the desired element). Cut-outs can be converted to cavities and vice versa (right-click the element > Context menu > Convert element).
Reference point
The imported file’s reference point is the front panel’s bottom-left corner or, if the front panel is not right-angled, the bottom-left corner of the unrotated rectangle enclosing it.
If there is no outer contour in the DXF file, the origin of the DXF file is defined as the reference point of the imported file.
