Macro elements
Icon |
Menu bar |
Keyboard shortcut |
|---|---|---|

|
Insert > Macro element |
K |
Macro elements are objects or groups of objects that do not belong to a specific front panel but rather are managed in a macro database so they can be reused. They generally consist of default milling elements or free contours and are intended for the assembly of electromechanical components. However, printing and engraving elements as well as studs can also be used for macros.

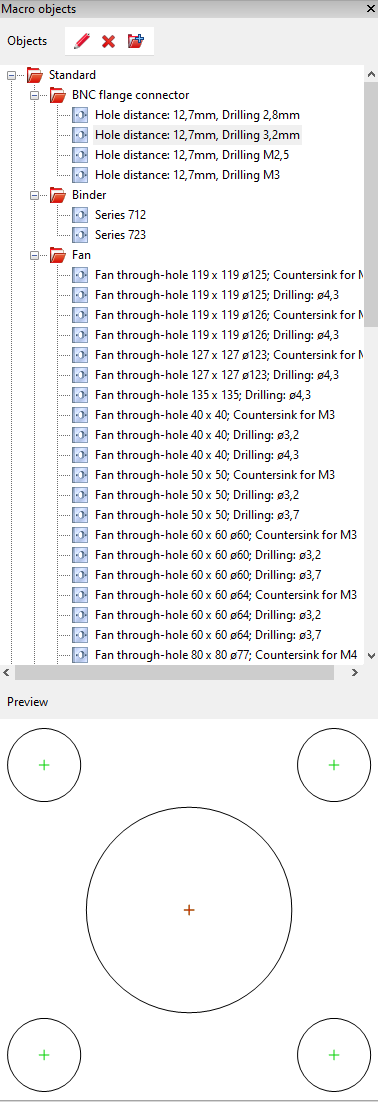
Once Front Panel Designer is installed, the catalog contains a set of basic entries in the Standard category. Within the User category, you can structure the macro elements catalog according to your own needs and expand it with macro elements that you create from a front panel’s grouped objects.
Macro elements can be placed on the front panel currently being machined via drag and drop from the tree view or from the preview graphic.
Inserting Elements
First, make sure that the Macro Elements sidebar is displayed (menu bar: View > Macro elements or key combination: Shift + Ctrl + M).
Select the desired macro element in the sidebar.

Inserting via drag and drop:
Drag the element from the menu tree or preview to the front panel. (If the grid is enabled, the element is placed on the nearest grid point).
Press the M key (or Context menu > Move) while the object is still marked.
Enter the desired coordinates in the “Move” dialog.
Inserting via the toolbar:
Once you have selected a macro element in the sidebar, click Insert macro element in the toolbar.
Select one of the insertion methods that now appear on the right side of the toolbar and place the element according to the selected method.
Creating a macro element
A macro element can be created from one or more objects. If there are several objects, they must first be grouped so that they can be converted into a macro.
Procedure:
Mark the object or group.
Press Shift + M or select Select > Create macro element.
In the Macro element properties dialog that opens, specify the category in which the macro is to be classified and assign a name, including a translation into the other languages supported by Front Panel Designer if necessary.
Editing a macro element
Editing the macro’s properties:
In order to be able to edit a macro element, you must first insert it into the front panel. Then, open the macro element’s properties dialog, for example, by double-clicking the element. Depending on whether the macro element is a group or a single object (for example, a free contour), the associated dialog opens with the corresponding editing options (for instance, for a group, rotation angle and reference point).
If the macro element is a group, you can select individual elements of the group for editing by double-clicking them while holding down the Ctrl key. If you want to add elements to the group, you have to group the group, together with the new elements, again.
If you have edited a macro element in this manner, it only affects the inserted element. The macro element in the database remains unchanged. To apply the changes for the macro element to the library, create a new macro element from the changed object and then delete the previous version (if desired).
Tip: Use supplied macros as templates. In contrast to the user catalog, the standard catalog cannot be edited. However, all the macros listed there are available for you as templates, which means you can insert any macros from the standard catalog into the front panel, modify them there, and then add them to the user catalog.
Editing the catalog entry:
In the user catalog, you can move, delete, and rename macro elements’ catalog entries by calling the desired entry’s context menu or by using the corresponding buttons in the macro manager’s header. You can also find the “Add category” button.
Integrating databases with macro files
Macros are organized in databases which Front Panel Designer does not import but rather reads in as required. The macros of an included database are displayed in the macro manager as a catalog with a folder hierarchy.
You can call a list of all currently included databases with information on the respective storage location via the Macro Files button (Edit > Settings > Interface). You can add or remove database files here.
