5. Rectangular cut-out
Rectangular cut-out
- Select Insert > Rectangular cut-out.
► On the right in the toolbar, four buttons appear with the various insertion options.

- Select the fourth option again: Enter coordinates relative to the snap point. Then move the cursor over the top the front panel and click as soon as the center point of the edge is snapped.
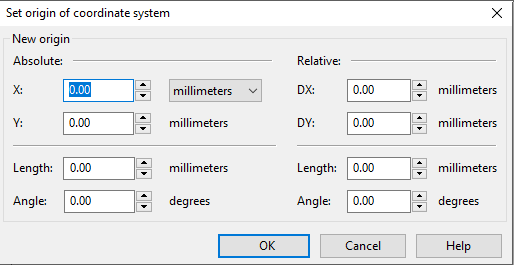
► The Set reference point dialog opens.

- Set the value for DY to -15 and confirm with OK.
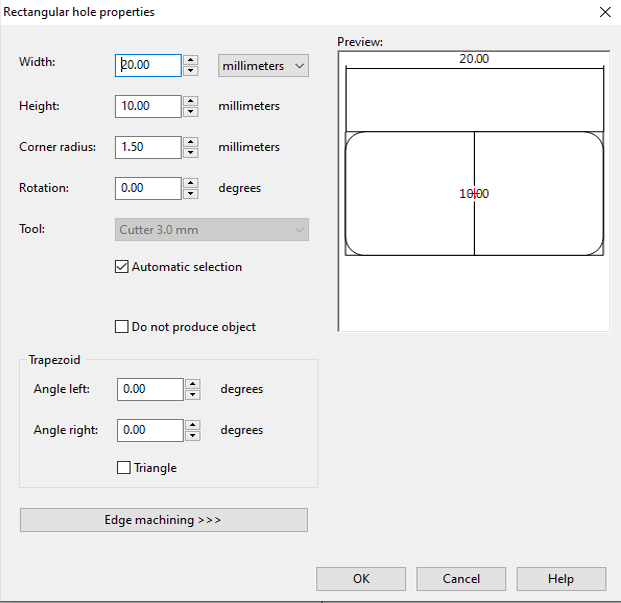
► The Rectangular cut-out properties dialog opens.

- Specify the following values:
Width = 20 mm
Height = 10 mm
Corner radius = 0.5 mm
- Confirm with OK.
► The rectangular cut-out is created.
Note: Tip for handling inner radii of cut-out corners. To adjust a cut-out to accommodate a rectangular component with “sharp” corners (outer radius = 0), the inner radii of the corners of the cut-out must be set to 0 mm. Then the corners are cleared out using a tool of the smallest diameter by initially using it to set drill holes in the corresponding corner points. Otherwise, the corner radius would remain at the value resulting from the radius of the tool with which the cut-out is machined out.
