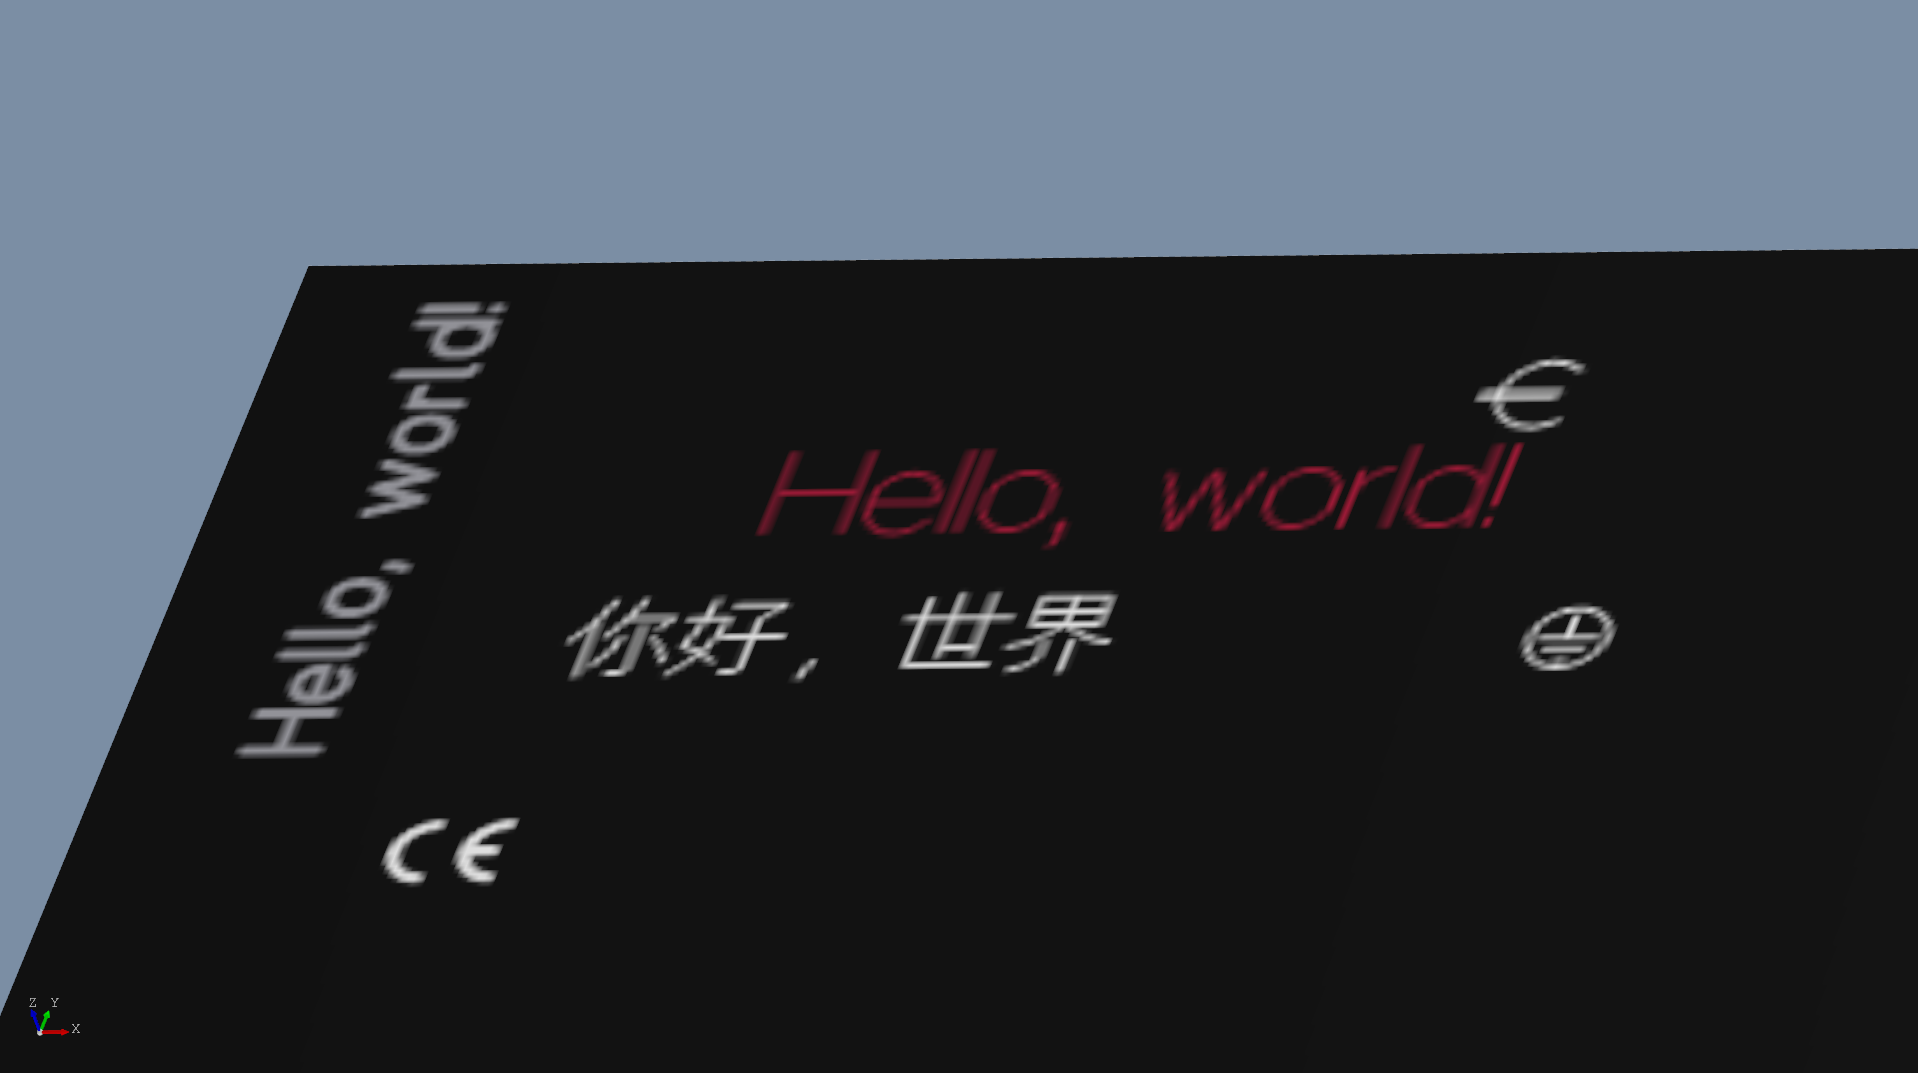
Text engraving
Icon |
Menu bar |
Keyboard shortcut |
|---|---|---|

|
Insert > Text engraving |
T |
You can use text engraving to place single or multiline labels on the front panel.

Function properties
Parameters |
Description |
|---|---|
Text |
Enter the desired character string here. |
Text size |
Text size in point, millimeter, or inch. |
X-stretch |
The lettering is stretched or compressed in the X direction by the factor entered. Selecting a negative factor mirrors the text. |
Rotation angle |
Rotation angle of the text engraving around its reference point. |
Line spacing |
The distance between the text rows’ baselines corresponds to the factor entered times the height of the text’s upper-case letters [mm]. |
Character skew |
Tangent of the text’s tilt angle (example: input of 100% corresponds to a tilt angle of 45°). |
Place on reverse side |
Check the box next to this option if the engraving is to be made on the reverse side of the panel. Note that when engraving text on the reverse side, the text must be mirrored so that it can be read from left to right when viewed from the reverse side. To mirror the text, enter “-1” as the X-stretch factor. In Front Panel Designer, the front panel will always be depicted in the frontal view. |
Cut after surface finishing |
Only for powder-coated panels. The check mark for text engraving is set by default and cannot be deselected. Additional information |
Do not produce element |
When the box next to this option checked, the element appears in the file for informational purposes only, but will not be produced. |
Character set |
Selection from a list of engravable character sets. |
In-fill color |
Color of the paint used to in-fill the gravure line. By selecting “No in-fill color,” the engraving remains blank. |
Horizontal alignment |
Multiline text can be centered or left or right-justified. The reference point acts accordingly. |
Vertical alignment |
Sets the reference point to the centerline or baseline of the first row of text. |
Tool |
You use this tool to determine the line width of the gravure lines and thus the basic appearance of the lettering. |
Automatic selection |
The most suitable tool for readability is automatically selected in accordance with the text’s size and font. |
Print/In-fill |
Here, you determine whether the engraving in question is to be printed or in-filled. The global setting from the front panel’s properties dialog is used by default. |
Inserting special characters
Each of the character sets available in Front Panel Designer contains special characters that you can insert when entering text. To enter a special character, write “xxx”, where “xxx” stands for the ASCII code.
Here, you can find a listing of all displayable characters for the character sets included in Front Panel Designer.
Tip: The DIN 17 character set in particular contains lots of useful special characters, including the CE mark.
Asian fonts
The character sets in Front Panel Designer also include the Asian single-entry characters (the CJK unified character set). This contains:
the basic Chinese characters,
the Japanese Katakana characters,
the Japanese Hiragana characters,
as well as the Korean Hangul characters.
Tip: These characters can be entered in Front Panel Designer either directly (via copy and paste, if applicable) or with \ (backslash) followed by the decimal character code.
Serial numbers
Label a front panel series with sequential serial numbers as follows:
Insert the first serial number as a text engraving into the appropriate spot in the front panel.
Note: If the serial number should be printed rather than engraved, select “Always print this element” in the text engraving dialog under Print/In-fill .*
In the Front panel properties dialog (Ctrl+ F), write the text “Please produce with serial number from… to…” in the Remarks for production field
Selecting tools for character sets
One tool is preset for each character set by default. For multiline character sets, there are often several different tools (only the largest tool is displayed in the Tool field in each case).
For single-line character sets, the letters’ line thicknesses always remain the same. This means that you can change the text’s appearance via the cutter selection (the larger the engraving tool/cutter you choose, the thicker the font’s line thickness and the more apparent the rounding at the end of the line that results from the tool diameter).
Multiline character sets are usually character sets that have alternating stroke thicknesses within the letters and often serifs. These features are implemented by combining different tool diameters. In doing so, the interaction of the tools has been optimized for each font size so that the serifs and alternating line thicknesses are displayed without leaving any burrs. You can also manually select a tool here, but this often leads to errors that are not always visible in the file. It is therefore advisable to leave the tool selection for multiline character sets set to automatic.
